Star Finders
When you’re ready to go farther, you’ll find star clusters, galaxies, and variable stars. Wow your students—or your friends—by showing them where the invisible supermassive black hole at the center of our Galaxy lurks in the sky. Sense the unseen cosmos by learning which stars are known to have planets of their own.
Dunlap Institute Star Finders are available for free to schools and community groups across Canada. Click below to reserve your set today!
Request Star FindersUsing Your Star Finder
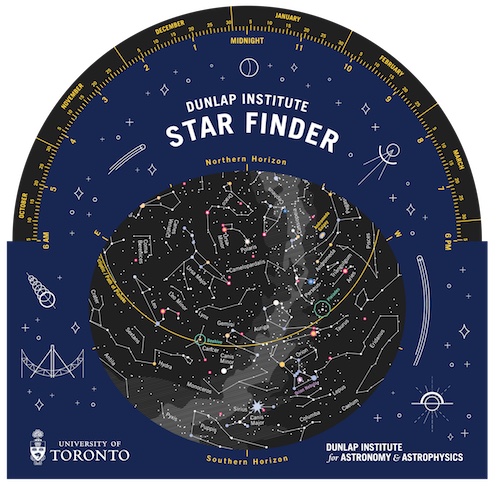
The Dunlap Institute Star Finder is designed to make it easy to learn about the night sky. By lining up the wheel with the cover, you can see what the sky will look like on any night of the year. The reversible wheel has two sides: one showing only the brightest stars and one showing many more stars. You can start with either side.
To use the Star Finder, simply insert the wheel in the sleeve and line up the current time with the current date. The portion of the wheel visible through the window on the cover shows the sky at that date and time. For example, in the image below, we have aligned the wheel to show the sky as it would appear on January 4 at midnight. This same configuration would also work for January 19 at 11:00 pm, December 20 at 1:00 a.m., and so on.
Once the Star Finder is lined up for your chosen date and time, the cutout in the cover will reveal a map of the sky. The edges of the cutout correspond to the entire horizon, with compass points as indicated around the edge. South is at the bottom so, if you hold the Star Finder in front of you facing south, the stars toward the bottom of the cutout will be in front of you. Similarly, the stars at the top, near the “N” marker, will be behind you, on the northern horizon. Stars in the middle of the cutout will be directly overhead.
The Star Finder is designed to work at latitudes around 45 degrees north, around the latitude of Toronto. It can still be used with little difference within a range of about 40 to 50 degrees north, covering most of southern Canada and the northern US (plus cities internationally in the same range of latitudes).
The “Bright” Side
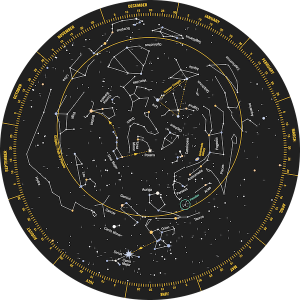
The “bright” side of the Star Finder shows a simplified view of the sky, similar to what you would see from within a city.
The side with only the bright stars shows you the sky as it might look when viewed from within a city. In cities, all the lights from human activity artificially brighten the sky and make it impossible to see dim stars. Astronomers call this “light pollution.” You can learn more about steps that can be taken to reduce it from the International Dark-Sky Association.
The “bright side” of the wheel contains guides to help you learn popular constellations. It shows you all the constellations of the zodiac, plus a few other popular ones. The dashed yellow lines are guides to help you use familiar stars to find interesting features on the sky. For example, in the image below, you can use the “pointer” stars in the bowl of the Big Dipper (labeled here using its scientific name, “Ursa Major”), to find the North Star, also known as Polaris. Or, you can follow the “arc” of the handle of the Big Dipper to find the yellow star Arcturus. We say you “follow the arc to Arcturus”. Arcturus is a noticeably yellow star, even to the naked eye, and a fun star to look for if you’ve never noticed the different colours of stars.
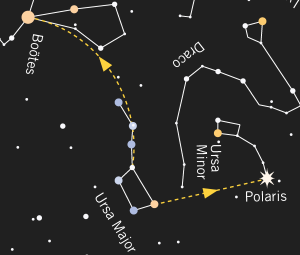
Guides on the “bright” side help you find interesting points of reference, such as the north star, Polaris, and the yellow star Arcturus in the constellation Boötes.
The “Faint” Side
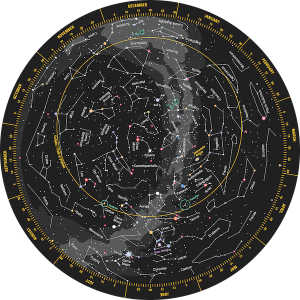
The side showing fainter stars shows you the sky as it would appear from a dark location, well away from city lights. It shows many more features than the “bright” sky, including:
- The streak of faint light that is our home galaxy, the Milky Way.
- Stars known to be orbited by planets (see: exoplanets).
- Variable stars, whose brightness you can actually see changing from night to night.
- The locations of a few black holes. These aren’t visible to the naked eye, but it’s cool to know when you’re staring right at one!
- Some star clusters that can be seen by the naked eye, including the famous Pleiades.
- The Orion Nebula, a beautiful cloud of gas forming thousands of new stars.
- The Andromeda Galaxy, the nearest galaxy to our own Milky Way.
- The brightest star in the night sky, called Sirius, labeled with a star symbol.
Finding Planets
From night to night, stars remain fixed in their positions relative to one another. This is why we can draw them on the Star Finder and you can use that same map of the sky from year to year without it changing. Planets, on the other hand, move among the stars as they orbit the Sun, often changing their positions noticeably from day to day or week to week. We can’t draw the ever-changing positions of the planets on the Star Finder, but we have drawn a solid yellow line that indicates the approximate path that the planets follow. If you see a bright light along this path that is not shown on the Star Finder, the odds are good that it’s a planet. You can always check by consulting the web page of Sky News Magazine, which publishes an updated guide to finding planets every week.
The line the planets approximately follow is called the ecliptic. It’s also the path the Sun follows through the stars over the course of the year.
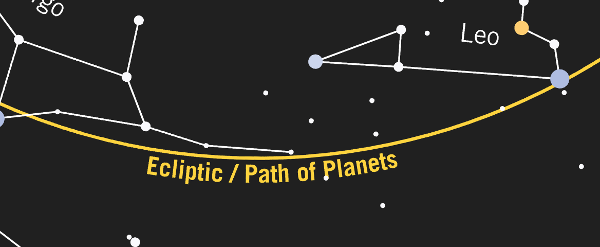
The planets will always be found close to the line labelled “Ecliptic”, which is the path of the Sun across the sky.
Daylight Saving Time and the Star Finder
The explanation printed on the Star Finder for how to account for Daylight Saving Time is unfortunately confusing. It will be fixed in future printings. Here is a better explanation:
From early November to mid-March, when DST is not in effect, the times on the dial of the Star Finder correspond to the times on your watch.
From mid-March to early November, when DST is in effect, subtract an hour from the times on your watch to find the correct time on the Star Finder. For example, when it’s 10 PM on your watch, set your Star Finder to 9 PM.
Acknowledgement
The Dunlap Institute Star Finder is adapted from the work of Jan Tošovský. See more at drifted.in.


